CRM y clientes
Customers
Your customers and prospects in one place, with everything they've paid, said and sent.
Add a customer
-
Click “New Customer”
In the sidebar, under Organize, open “Customers”. You can also use “Create” → “New customer”.
-
Enter the main details
Name, email and phone. Two customers can't share the same email.
-
Add the rest if you have it
External ID (the one from your system), source, address and your custom fields. Click “Create Customer”.
Note
Import many at once
-
Open Import
Go to Settings → Import and start a new import.
-
Upload your CSV file
Choose the Customers type and upload the file. When it finishes you see how many rows went in correctly, how many had errors and how many were skipped.
Find a customer
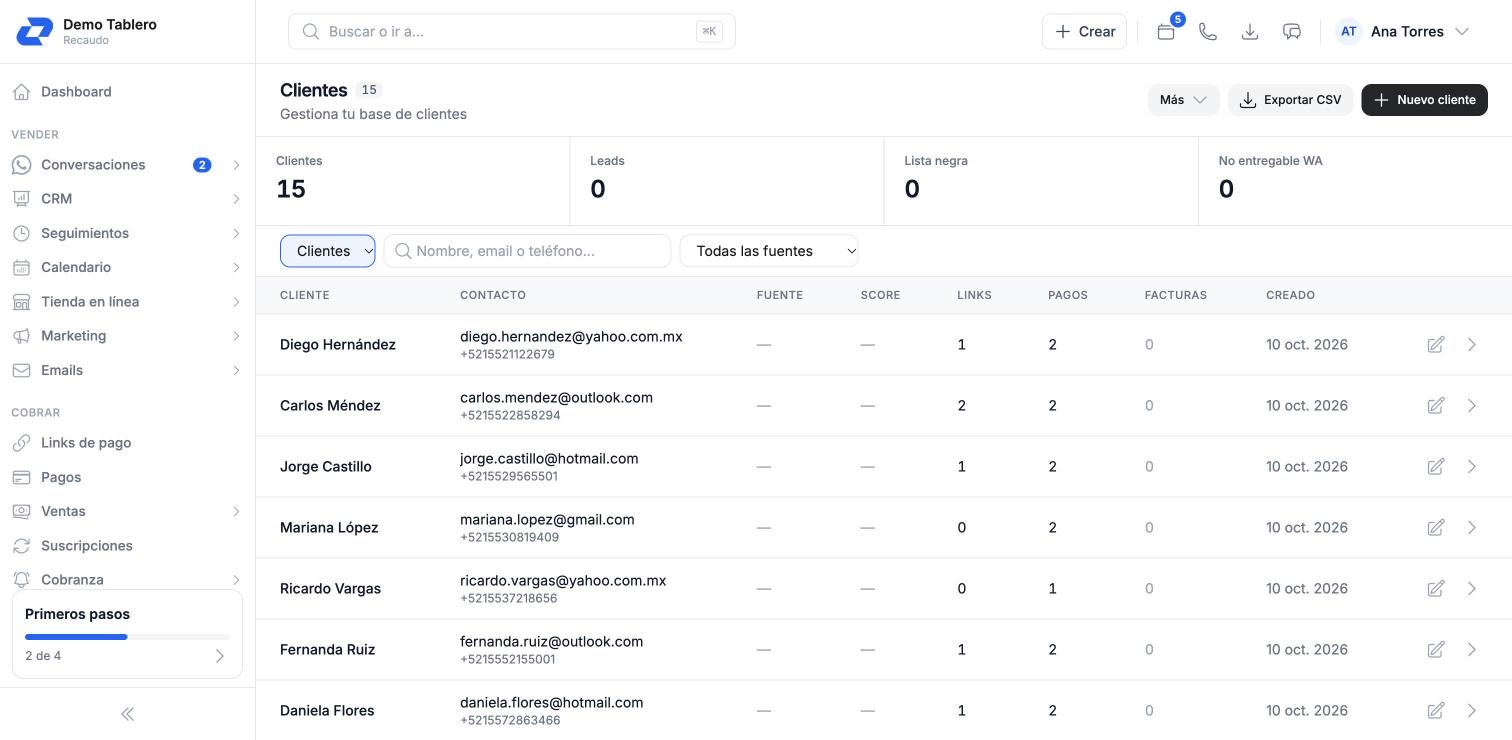
Above the list you see how many you have in each view. Use the selector to switch between:
- Customers: people who already buy from you or owe you.
- Leads: prospects who came in through WhatsApp or other channels.
- Blacklist: people who asked not to be contacted. Nothing is sent to them.
- WA undeliverable: numbers without WhatsApp or with messages that don't get delivered.
Search by name, email or phone, filter by source and use “Export CSV” to download the list.
The customer profile
Click a customer to open their profile. It's organized in tabs:
- Finance: payments, payment links, invoices, saved payment methods and subscriptions.
- Communication: conversations, emails and calls.
- Files: the customer's documents (PDF, image or document up to 20 MB), sorted by document type.
- Activity: everything that has happened with the customer.
On the side you see their tags, lists, lead score, custom fields and their customer portal access, where you can send them the invitation. You can charge them without leaving the profile.
Store your own data with custom fields
-
Open Custom fields
In Customers → Custom fields click “New Field”.
-
Define the field
Name it and choose the type: text, number, date, dropdown, checkbox, URL, email, phone or long text. Mark whether it's required and whether it shows in the customer table.
-
Use it
The field appears when you add a customer and on their profile, and you can also use it as a variable in your templates.
Tip