Automatización e inteligencia artificial
Automations
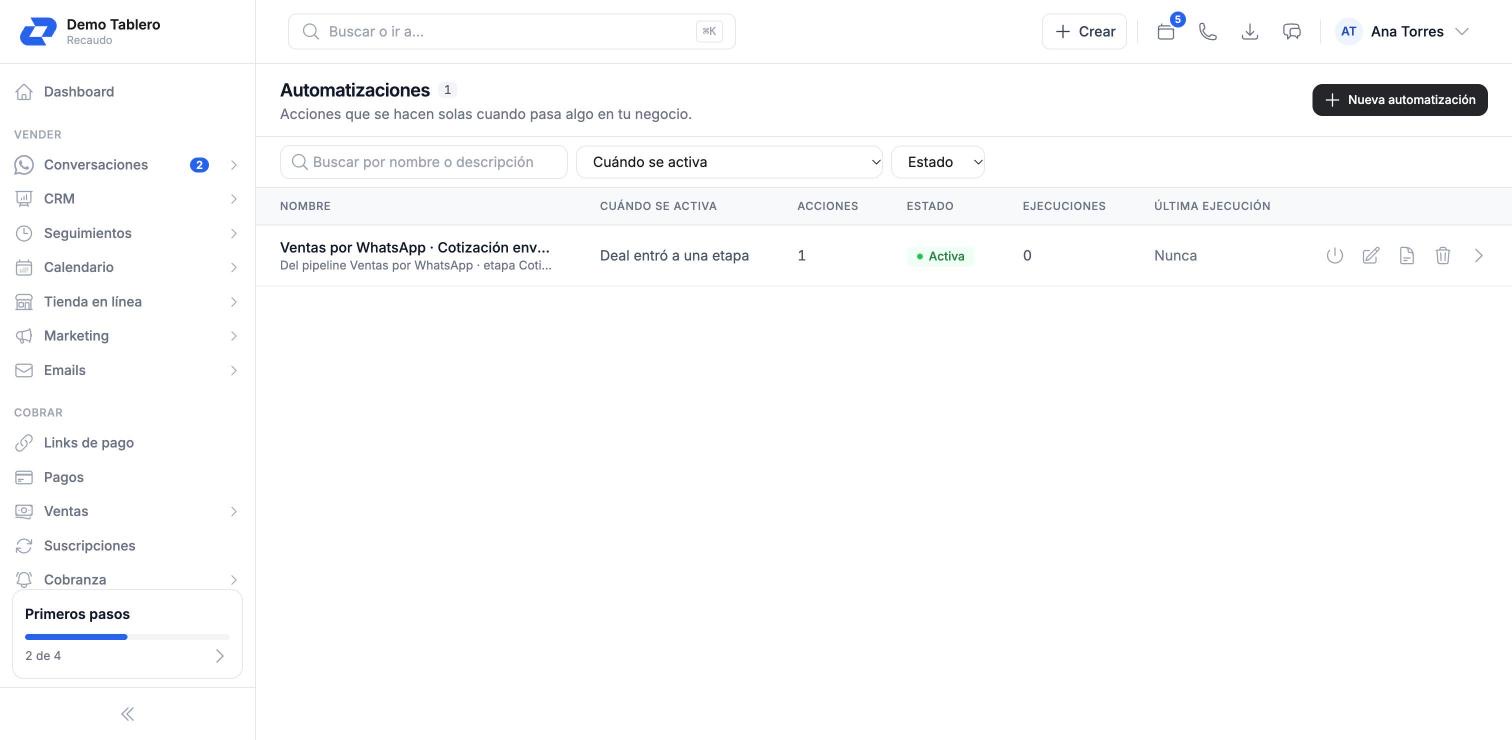
Let Recaudo act on its own when something happens in your business: a payment, a new customer, a tag or a won deal.
Create an automation
An automation has three parts: an event that triggers it, optional conditions and the steps it performs.
-
Open Automations
In the sidebar, under Organize, go to Automations and click New automation. -
Name it
Enter a Name and a Description explaining what it is for. Keep Activate automation checked if you want it to start working when you save. -
Choose when it runs
Under When it runs pick the Event, for example Payment succeeded or Conversation tag added. If it should only run in some cases, use Add condition and choose whether All or Any must match. The Available data panel shows what data the event carries. -
Define what it does
Under What it does use Add step to add actions; they run in order. With Insert a wait before you can wait minutes, hours, days or business days between steps. -
Save
Click Create automation. To avoid repeats, open Limits and priority and set the maximum runs per record or a pause between runs.
Events that trigger it
Events are grouped by topic in the selector. The main ones:
- Payments and payment links: payment succeeded, failed or refunded; payment link paid or expired.
- Invoices and subscriptions: invoice overdue or about to be due, invoice paid, subscription renewed or canceled, subscription payment failed.
- Customers, leads and tags: customer created or updated, lead converted, customer or conversation tag added or removed.
- Conversations: conversation created, assigned or resolved; message received or sent.
- CRM and follow-ups: deal created, stage changed, won or lost; follow-up created, completed or overdue.
- Collections: payment promise created, due today, kept or broken.
- Store, forms and events: order created, abandoned cart, form submitted, event registration.
What it can do
Each step is one of these actions:
- Send WhatsApp (with an approved template) or Send email.
- Create follow-up or Notify internal user so someone on your team takes care of it.
- Add tag, Remove tag, Add to list or Remove from list.
- Create deal or Move deal in your CRM pipeline.
- Assign agent or Assign AI agent to the conversation.
- Launch flow, Update field or Mark event attendance.
- Webhook to notify another system, or Run code (JavaScript) for special cases.
Note
The Send WhatsApp action can only use templates approved by Meta, because it usually writes to a customer who has not messaged you in the last 24 hours.
Pause and review results
From the list and from each automation’s detail page you control whether it runs and see what it did.
-
Activate or deactivate
In the list use the Activate or Deactivate icon. A deactivated automation does not run, but keeps its settings. -
Check the history
Open the automation to see Runs, Succeeded, Failed and Success rate. Under Recent runs you see each run with its status and, if it failed, the error. -
Duplicate to reuse
Use Duplicate to create a variant without starting from scratch.
Tip
Start with something simple, like notifying your team when a large payment comes in. Once the history shows it runs well, add steps and waits.
Next steps
Was this page helpful?
Thanks for letting us know.